

Quick Answer
To clean a living room, remove clutter, dust surfaces from top to bottom, wipe furniture, vacuum upholstery, and finish by cleaning the floors. Use products suitable for each material and return items to their proper places. A practical living room furniture arrangement also makes regular cleaning easier.
Six essential cleaning stages
- Clear unnecessary items: Remove trash, dishes, clothing, and anything that belongs elsewhere.
- Organize your belongings: Put remotes, books, toys, and accessories into designated storage.
- Dust upper surfaces: Clean accessible shelves, lamps, tables, and other dust-collecting areas.
- Clean the furniture: Wipe suitable hard surfaces and vacuum upholstered seating.
- Refresh the floors: Vacuum rugs and carpets, then clean hard flooring appropriately.
- Finish the room: Replace clean accessories, arrange cushions, and remove cleaning supplies.
Quick tip: Work from high surfaces toward the floor so falling dust doesn’t undo your earlier cleaning.
A messy living room can make an otherwise comfortable home feel overwhelming. Fortunately, restoring order doesn’t require expensive equipment or an entire weekend.
I recommend following the same cleaning sequence every time. This 2026 guide explains 12 practical steps, material-specific cleaning methods, and simple routines that help your living room stay comfortable.
What Does Cleaning a Living Room Involve?
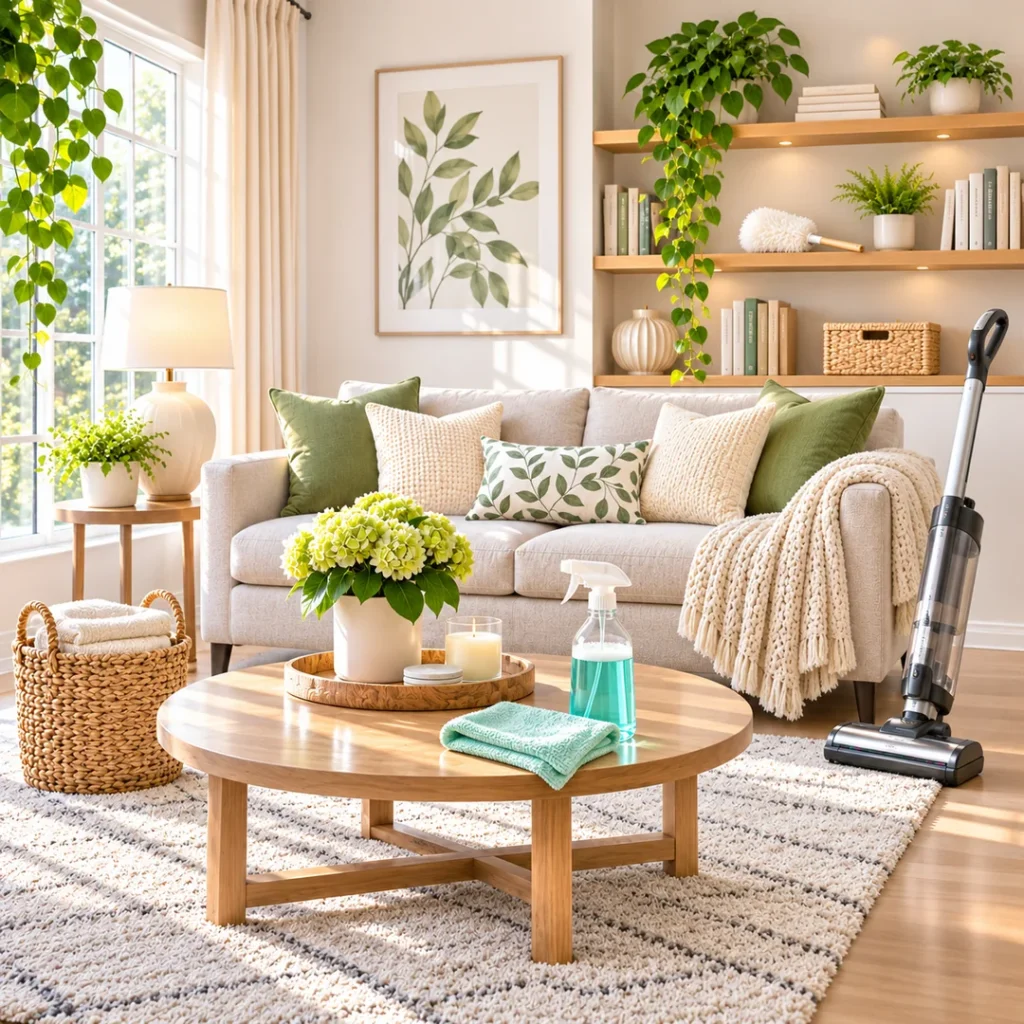
Living room cleaning is the process of removing clutter, dust, dirt, stains, and everyday debris from furniture, decorative items, and floors. It also involves organizing belongings so the space remains functional.
Cleaning differs from disinfecting. According to the Centers for Disease Control and Prevention, routine cleaning with soap or detergent generally removes most germs from household surfaces.
A complete living room cleaning routine usually covers five areas:
- Decluttering: Removing unnecessary objects and returning misplaced items.
- Dust removal: Cleaning shelves, fixtures, furniture, and decorative accessories.
- Surface cleaning: Wiping tables, cabinets, handles, and other frequently touched areas.
- Fabric care: Vacuuming sofas, cleaning suitable upholstery, and laundering washable textiles.
- Floor care: Removing debris from carpets, rugs, hardwood, laminate, or tile.
Regular cleaning focuses on visible dirt and frequently used surfaces. Deep cleaning reaches less accessible areas, including underneath furniture and behind large objects.
What Cleaning Supplies Do You Need?
You can clean most living rooms with a small collection of basic supplies. Start with equipment you already own before buying specialized products.
- Microfiber cloths: For collecting dust and wiping suitable surfaces.
- Vacuum cleaner: For carpet, rugs, upholstery, and accessible corners.
- Soft brush or duster: For shelves, blinds, and delicate decorations.
- Mild household cleaner: For compatible hard surfaces.
- Floor cleaner: Specifically approved for your flooring material.
- Trash bags: For rubbish and disposable waste.
- Laundry basket: For collecting misplaced textiles and belongings.
- Cleaning gloves: When required by the cleaning product’s label.
- Upholstery attachment: For vacuuming cushions and fabric furniture.
Choose fragrance-free products when strong scents cause irritation. Always read the cleaner’s label and the furniture manufacturer’s care instructions.
How Do You Clean a Living Room Step by Step?
The easiest approach is to follow a consistent order, beginning with clutter and finishing with the floor. These 12 steps work for small apartments, family living rooms, and larger shared spaces.
Step 1: Prepare the Room and Gather Your Supplies
Bring your cleaning equipment into the living room before starting. This saves repeated trips to other rooms.
Improve ventilation when using cleaning products, provided outdoor conditions are suitable. Keep children and pets away from cleaning chemicals and wet floors.
- Collect your vacuum, microfiber cloths, and appropriate cleaners.
- Move lightweight obstacles out of your cleaning path.
- Check product labels for ventilation and safety requirements.
- Unplug small electrical items before cleaning around them when appropriate.
Set aside a basket for items that belong elsewhere. Avoid moving heavy furniture alone or blocking exits with cleaning equipment.
Step 2: Remove Trash, Dishes, and Unnecessary Items
Start by removing obvious rubbish. Empty cups, food wrappers, tissues, and unwanted packaging create visible clutter.
Walk around the room once with a trash bag and collection basket. Focus on removing items rather than reorganizing everything immediately.
- Throw away rubbish and unwanted packaging.
- Take dirty dishes to the kitchen.
- Collect clothing and misplaced laundry.
- Set aside objects that belong in other rooms.
Don’t spend time sorting individual drawers during this first pass. The immediate goal is to expose the surfaces that need cleaning.
Step 3: Declutter and Organize the Living Room
Once the rubbish is gone, organize useful belongings. Give frequently used items a consistent storage location.
I prefer keeping a small basket or drawer near the seating area for everyday essentials. It reduces the need to clear the coffee table repeatedly.
- Remote controls: Store them in a tray or organizer.
- Books and magazines: Return them to shelves or a designated basket.
- Toys: Keep them in an accessible container.
- Chargers: Organize cables without overloading outlets.
- Decorations: Remove excessive items that make surfaces difficult to maintain.
In compact rooms, concealed storage can simplify daily maintenance. Explore these space-saving furniture ideas for small living rooms if clutter is a recurring problem.
Step 4: Remove and Refresh Washable Textiles
Living room fabrics collect dust, hair, crumbs, and everyday odors. Begin by checking which cushion covers and throws are washable.
Follow the care labels rather than assuming every fabric can go into a washing machine.
- Remove washable cushion covers and throw blankets.
- Check their washing and drying instructions.
- Launder compatible items with suitable detergent.
- Set delicate or nonwashable items aside for appropriate cleaning.
- Allow everything to dry completely before replacing it.
Don’t soak nonremovable upholstery or wash covers labeled for specialist cleaning. Shrinkage, color bleeding, and trapped moisture can damage furniture.
Step 5: Dust High Surfaces First
Dusting high surfaces before lower furniture prevents falling particles from landing on freshly cleaned areas. Begin with safely reachable fixtures and shelving.
The Environmental Protection Agency’s guidance on indoor particulate matter recommends damp dusting to reduce particles becoming airborne.
- Dust accessible high shelves and bookcases.
- Clean compatible light fixtures after switching them off and allowing them to cool.
- Wipe picture frames and decorative accessories.
- Clean accessible window trim and blinds.
- Work downward toward lower cabinets and tables.
Use a stable, suitable tool for overhead areas. Avoid reaching across unstable furniture or spraying liquid onto electrical fixtures.
When replacing books and decorative objects, consider leaving some empty space. These shelf decorating ideas can help create attractive arrangements that remain easy to dust.
Step 6: Clean Windows, Mirrors, and Window Areas
Dusty window ledges and fingerprints can make a clean living room look neglected. Clean accessible glass and surrounding surfaces with products suitable for their finishes.
A soft microfiber cloth often works well for routine cleaning. For stubborn marks, use an appropriate glass cleaner according to its label.
- Dust accessible blinds or shutters.
- Wipe window sills and frames.
- Remove fingerprints from compatible glass.
- Clean mirrors with a suitable product and soft cloth.
Never lean outside windows or attempt unsafe exterior cleaning. Professional help may be necessary for high or difficult-to-reach glass.
Step 7: Wipe Frequently Touched Surfaces and Electronics
Remote controls, switches, door handles, and table edges receive frequent contact. Cleaning these areas regularly helps remove accumulated dirt.
Use a slightly damp cloth where appropriate, and follow the manufacturer’s instructions for electronic devices.
- Remote controls: Wipe the exterior without letting moisture enter buttons.
- Light switches: Use an appropriate cloth without spraying liquid directly.
- Door handles: Clean with a product compatible with the finish.
- Television screens: Use only screen-safe methods recommended by the manufacturer.
- Controllers and devices: Remove surface dust carefully around openings.
Routine cleaning is usually sufficient in healthy households. Additional disinfection may be appropriate after illness, following product instructions.
Step 8: Clean Coffee Tables, Cabinets, and Shelves
Tables and cabinets collect fingerprints, dust, drink rings, and small spills. Remove accessories before wiping the underlying surfaces.
Match the cleaning method to the finish. Some wood, stone, metal, and lacquered surfaces can react poorly to excess moisture or harsh chemicals.
- Remove decorative objects and everyday accessories.
- Dust the tabletop and accessible edges.
- Clean spills using a finish-compatible product.
- Dry surfaces when the care instructions require it.
- Return only useful or meaningful objects.
A simple arrangement is easier to maintain than a crowded tabletop. Try these coffee table decor ideas when returning accessories to their places.
Step 9: Vacuum and Refresh Sofas and Chairs
Upholstered seating often traps crumbs, dust, pet hair, and debris between cushions. Vacuuming is an important part of regular living room cleaning.
Check the upholstery care label before applying water or cleaning solutions. Different fabrics require different cleaning methods.
- Remove loose cushions where the furniture design allows.
- Vacuum seating surfaces with a suitable upholstery attachment.
- Clean accessible seams and crevices carefully.
- Check beneath cushions for loose objects.
- Address stains only with methods approved for the fabric.
Common upholstery cleaning codes include W for water-based cleaning and S for solvent-based cleaning. The manufacturer’s instructions take priority, especially for delicate fabrics.
Avoid soaking cushions or using a carpet extractor on upholstery without confirming compatibility. Excess moisture can remain inside the padding.
Step 10: Vacuum Carpets and Area Rugs
Carpets and rugs trap dust, grit, hair, and particles tracked indoors. Vacuum them after cleaning higher surfaces.
Choose a vacuum setting appropriate for the rug or carpet. Delicate fibers, fringe, and loose weaves may require gentler cleaning.
- Remove lightweight objects from the area.
- Check the carpet or rug’s care instructions.
- Vacuum accessible sections systematically.
- Use an appropriate attachment near edges.
- Inspect visible spots for suitable stain treatment.
Give high-traffic areas extra attention when needed. Promptly remove dry debris before it becomes embedded in the fibers.
Step 11: Clean Hardwood, Laminate, Tile, or Vinyl Floors
Clean hard floors after dusting and vacuuming. This removes particles that fall during earlier cleaning.
Use the method recommended by the flooring manufacturer. Waterproof tile and moisture-sensitive hardwood require different approaches.
- Hardwood: Use an approved cleaner and avoid standing water.
- Laminate: Follow manufacturer guidance and avoid excessive moisture.
- Tile: Remove grit and use an appropriate cleaner for tile and grout.
- Luxury vinyl: Use a finish-compatible cleaner and avoid unapproved harsh chemicals.
Start at the far side of the room and work toward the exit. Allow cleaned floors to dry before replacing furniture or permitting foot traffic.
Step 12: Put Everything Back and Complete the Final Check
The final step restores the room’s comfort and appearance. Return cleaned textiles, arrange the furniture, and replace essential accessories.
Take a moment to inspect the room from the doorway. This helps reveal anything left behind.
- Replace completely dry cushion covers and throws.
- Arrange cushions and blankets neatly.
- Return books and frequently used objects.
- Check that walking paths and exits remain clear.
- Remove cleaning supplies and empty collected rubbish.
If the room still feels crowded, reconsider the amount of decor on display. My living room decorating guide offers a useful starting point for creating a balanced arrangement.
What Is the Best Way to Clean Different Living Room Surfaces?
Different materials need different cleaning methods. Using one strong cleaner everywhere can damage finishes or upholstery.
The following table provides general starting points. Always prioritize product labels and manufacturer care instructions.
| Surface | Routine Cleaning | Avoid |
|---|---|---|
| Finished wood furniture | Soft cloth and finish-approved cleaner | Excess water and abrasive scrubbing |
| Fabric sofa | Upholstery vacuum attachment and approved spot care | Unapproved chemicals or soaking |
| Leather upholstery | Soft cloth and leather-safe care products | Harsh detergents and saturation |
| Glass and mirrors | Soft cloth and suitable glass cleaner | Abrasive pads |
| Carpet and rugs | Suitable vacuum setting and approved spot treatment | Overwetting and aggressive brushing |
| Hardwood and laminate | Dust removal and manufacturer-approved floor care | Standing water and unsuitable steam cleaning |
| Television and electronics | Manufacturer-approved soft cloth and cleaning method | Direct liquid spraying and excess pressure |
How Long Does It Take to Clean a Living Room?
A quick tidy might take 10–15 minutes, while routine cleaning may require 30–60 minutes. A deep clean can take longer, depending on room size, clutter, furniture, and stains.
These are planning estimates, not guaranteed completion times.
- 10–15 minutes: Remove rubbish, return belongings, tidy cushions, and address visible dirt.
- 30–60 minutes: Declutter, dust, wipe suitable surfaces, vacuum upholstery, and clean floors.
- 60–120 minutes or longer: Include detailed shelves, accessible furniture undersides, textiles, and additional stain care.
A small, regularly maintained room will generally need less work. Large or heavily used living rooms may require several shorter sessions.
How Often Should You Clean Your Living Room?
The ideal frequency depends on how often the room is used. Homes with pets, children, or heavy foot traffic may need more frequent attention.
Daily Living Room Cleaning
A short daily reset prevents small messes from building up. Focus on items that make the room look untidy.
- Remove rubbish and dirty dishes.
- Return remotes, books, and toys to storage.
- Wipe fresh spills with appropriate methods.
- Arrange cushions and throws.
Weekly Living Room Cleaning
Schedule a more complete cleaning session around your household’s needs. Regular attention helps prevent visible dust and debris from accumulating.
- Dust accessible furniture and shelves.
- Clean frequently touched hard surfaces.
- Vacuum sofas, rugs, and carpets as appropriate.
- Clean hard floors with suitable methods.
- Check washable textiles for laundering needs.
Monthly or Periodic Deep Cleaning
Use occasional deep-cleaning sessions for areas that routine cleaning misses. Some tasks may be needed more or less often.
- Clean safely accessible areas behind furniture.
- Dust baseboards and window trim.
- Inspect furniture crevices and hidden debris.
- Review accumulated clutter and unused items.
- Clean curtains or other textiles when their care instructions and condition warrant it.
How Can You Clean a Living Room in 10 Minutes?
When guests are coming, focus on visible clutter and the most-used areas. A 10-minute routine improves the room’s appearance without attempting a complete deep clean.
- Minutes 1–2: Collect rubbish and remove dirty dishes.
- Minutes 3–4: Return misplaced items to their usual locations.
- Minutes 5–6: Wipe visibly dirty, compatible hard surfaces.
- Minutes 7–8: Vacuum or sweep the most-used accessible floor areas.
- Minutes 9–10: Arrange cushions, straighten textiles, and remove supplies.
Deal with urgent spills and safety hazards first, even if this changes the schedule. Don’t rush chemical cleaning or leave floors wet for guests.
What Living Room Cleaning Mistakes Should You Avoid?
Common mistakes can waste time or damage furniture. Most are preventable with proper sequencing and material-specific care.
- Cleaning floors first: Dust from higher surfaces may fall onto freshly cleaned flooring.
- Using one cleaner everywhere: Different surfaces require compatible cleaning products.
- Mixing cleaning chemicals: Certain combinations can release dangerous fumes.
- Overwetting upholstery: Excess moisture can damage fabric or remain trapped inside cushions.
- Ignoring labels: Furniture and product instructions identify important restrictions.
- Moving heavy furniture carelessly: Improper lifting can cause injuries or damage flooring.
- Adding fragrance instead of cleaning: Air fresheners don’t remove dirt, dust, or the source of odors.
Never mix bleach with ammonia, acids, or other cleaners. The CDC’s bleach safety guidance explains why incompatible cleaning products can create dangerous vapors.
Use the minimum appropriate amount of cleaner and ventilate as directed. New York State’s safe cleaning recommendations also emphasize proper product storage and surface compatibility.
How Do You Keep a Living Room Clean With Kids and Pets?
Living rooms used by children and pets often collect more crumbs, toys, hair, and tracked-in dirt. The best approach combines simple storage with frequent attention to problem areas.
- Use washable textiles: Choose removable, washable covers where practical.
- Create toy storage: Place an accessible basket near the play area.
- Clean pet resting spots: Vacuum and wash pet bedding according to its instructions.
- Address spills quickly: Use surface-safe methods before stains become harder to remove.
- Manage tracked-in dirt: Keep suitable mats near entrances and clean them regularly.
- Secure cleaning supplies: Store chemicals and equipment away from children and animals.
People with allergies or asthma may benefit from additional dust-control measures. The EPA’s indoor biological contaminants guidance discusses damp dusting, vacuuming, moisture control, and other preventive measures.
Consider a vacuum with effective particle filtration if household dust is a particular concern. Follow the manufacturer’s maintenance instructions for filters and dust containers.
Which Living Room Cleaning Tools Are Worth Considering?
You don’t need an expensive collection of gadgets to keep a living room clean. A useful tool should solve a specific problem and work safely with your furniture.
These two products suit different cleaning needs. The ratings distinguish an editorial suitability assessment from a published customer rating.
🏆 Best for Routine Dusting
OXO Good Grips Microfiber Hand Duster
★★★★☆ 4/5 — Editorial suitability
This 18-inch hand duster features a flexible microfiber head that removes for machine washing. I favor reusable dusting tools for routine furniture care because they reduce dependence on disposable refills. This is an editorial recommendation, not a claim of hands-on testing.
🛋️ Best for Compatible Upholstery Stains
BISSELL Little Green Portable Cleaner 1400B
★★★★☆ 4.4/5 — Manufacturer-listed customer rating
This corded portable cleaner has a 48-ounce clean-water tank, four-foot hose, and specialized stain-cleaning attachments. I would consider it for households dealing with recurring spills, provided the upholstery permits water-extraction cleaning. It is not appropriate for every fabric.
Affiliate disclosure: This article contains affiliate links. We may earn a commission from qualifying purchases at no additional cost to you. Editorial suitability scores are not verified customer-review averages.
Frequently Asked Questions About Cleaning a Living Room
1. What is the correct order to clean a living room?
Start by removing rubbish and clutter. Next, dust higher surfaces, wipe suitable furniture, clean frequently touched areas, and vacuum upholstered seating. Finish with carpets and hard floors before returning accessories. This top-to-bottom sequence reduces the chance of falling dust undoing earlier work.
2. How do you clean a living room without a vacuum cleaner?
Use microfiber cloths for dusting and a suitable broom or floor-cleaning tool for compatible hard floors. A soft upholstery brush may remove some surface debris from furniture. Carpets and fabric sofas can be harder to clean thoroughly without a vacuum, so consider occasional access to one.
3. How do you clean a fabric sofa at home?
Check the sofa’s care label first. Remove loose crumbs with a suitable vacuum attachment and clean accessible seams carefully. Treat stains only with a method approved for the fabric, testing as directed. Avoid soaking cushions, and allow cleaned areas to dry completely before use.
4. Do you need to disinfect your living room every day?
Most households do not need daily disinfection of every living room surface. Routine cleaning usually removes dirt and most germs. Disinfection may be appropriate when someone is sick or at increased risk. Always clean first and follow the disinfectant label’s instructions, including its required contact time.
5. How often should you deep clean your living room?
A monthly or seasonal deep-cleaning session can be a useful starting point, depending on household activity. Focus on accessible areas behind furniture, detailed dusting, neglected corners, and textile care. Homes with pets, allergies, or heavy use may benefit from more frequent attention.
Final Thoughts: Make Living Room Cleaning Easier
Learning how to clean a living room becomes easier when every task follows a logical order. Begin with clutter, work downward through furniture and surfaces, and finish with clean floors.
Consistency matters more than perfection. A short daily reset and regular attention to dust and spills can reduce the effort needed during larger cleaning sessions.
Your next step: Set aside 15 minutes today to clear your coffee table, return misplaced items, and clean the most-used surfaces. Then use the 12-step checklist for your next complete living room cleaning session.